So, it has been a long week or two doing up my hmm gojulas. A rather enjoyable progress, I must give credit to kotobukiya for this amazing piece of engineering and details. Unlike many other hmm kits, gojulas is a huge solid piece that would stay in place after you fit him together. He is a huge and heavy plastic chunk fitted bit by bit with minimal hand painting required to bring out his full potential. I'm not an avid kit painter though and I regret that I could only give him my minimal effort when it comes to painting. Regardless, I've sort of made up my weathering him ;making him dirty.. Hehe
Here are some pictures without further or do
Wednesday, 6 May 2015
Hmm gojulas the final
Monday, 27 April 2015
Hmm gojulas w.i.p
4 months going 5 into the year, I look back and realise how big a hole I've burnt into my wallet :,)
This has been a good year of collecting new toys and models. Having taken a break from gunpla building with hot toys, I've broken away from that affair and started aggressively expanding on my zoids collection. With this gojulas, I should probably take a step back and drag my old gundams back into the spotlight. Without further or do, here are some pictures.
Sunday, 5 April 2015
Bt hmm saber tiger gold
I am finally done with my saber tiger gold that my girlfriend surprised me with last week. For a bootleg, I must say that it's surprisingly good *insert pun - shield liger*
Overall, the gold is rather well sprayed on, there r no obvious unfinished parts on its gold armor. The main saber tiger frame is rather solid and rigid. Except for the elbow joints circular sides? ??
The weapons attached are complex and are a joy to put together. It almost feels like building another leg for the saber tiger even though it's an add on part to the main frame.
I'm disappointed however that this kit didn't come with rudolph nor stickers u like the kotobukiya one. The parts didn't really fit well together sometimes probably due to the quality control over at bt. However overcoming that, I have a astoundingly beautiful zoid in my collection.
Nub marks wise, yes it does scar but it can be resolved rather easily with a gundam marker. The gold is of a different shade. However, it is unobvious unless one purposely spots it.
I won't be posting any wip pics though, they are just too tedious to take and yes, my phone is running out of space
Till next time!
Sunday, 29 March 2015
Custom weathered iron kong
Weathered with chrome silver and tamiya's weathering kit. I've tried to replicate a would be scenario where kong's armor is both scrapped and damaged from his fights with his chief adversary, the gojulas. Iron kong was designed as a counter to the Republic's gojulas. And through many battles, both zoids held an edge over each other by countering with weapons such as the gojulas super cannon and the iron kong's answer,
The truster unit which allowed it to outmaneuver the cannons.
Saturday, 28 March 2015
Hmm iron kong 100%
Done with iron kong. Here are some size comparisons with the bt shield liger as well as threezero 's shield liger. Height wise, iron kong is indisputably the tallest. Width wise, his body is the largest, however, with guns extended, the bt shield liger triumphs.
Enjoy the pictures :)
Friday, 27 March 2015
Hmm iron kong in progress part 2
The build has been fulfilling so far, done with his weapons; beam bazooka?? , missles, shoulder missles etc. Uncompleted, one can already picture the beast all done up. Just the bust alone looks so magnificent. Enjoy the pictures!
Wednesday, 25 March 2015
Hmm Iron kong in progress pt 1
Got this real cheap on Wednesday from a dealer on gum tree. I must say that I'm really excited to be able to embark on this new project. I've since getting my hands on a gojulas, I've always wanted a iron kong to pair up with it. A tomy iron kong just nv had the appeal of posablility. My wish finally came true with this purchase
I've completed the head and chest over 2 days, each day spending about one hour. The amount of details are just so captivating. I probably haven't been this hooked since my ex-s gundam.
Enjoy the pics, more to come soon enough.
Diorama in the making pt 1
Starting out my new project, inspired by some of woodlandscenic ' s tutorial videos.
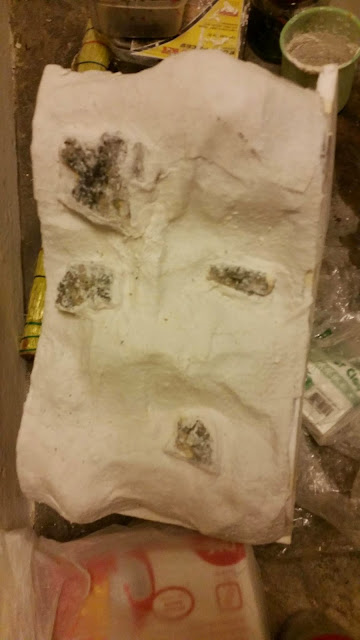
Beginning with some basic materials such as styrofoam boards, newspapers and tape, I cut out the basic shape on the styrofoam that I wanted; a downslope of a hill. Next, I crushed some newspapers and put them between the styrofoam. Of course, I regularly tape it to ensure that it doesn't burst out and ruin everything later on due to the added weight and materials.
I used paper mache as my first layer of the slope followed by two layers of plaster cloth. Spreading out the plaster on the cloth is essential to remove the cloth pattern.
Next, I used the woodlandscenics mold for rock faces and plaster to cast a few blocks. I've reused some "rocks" from a previously failed project to lessen my trouble.


